Linux の Apache で ASP.NET を実行する
先回の記事では、"Mono" を使い、Linux で ASP.NET を実行する方法を紹介した。
先回の記事では、xsp Web サーバーを使い、デモプログラムを実行した。
今回の記事では、Web サーバーの大本命である "Apache HTTP Server" 上で、ASP.NET を動作させる方法を紹介する。
もちろん、OS は、前回同様に Linux を用いる。
ここでは、CentOS 5.5 x64 を例にとり、説明を進める。
以降の手順は、先回の記事、Linux で ASP.NET を実行する方法の手順を終えていることを前提とする。
[http://mono-project.com/] へアクセス、[download] を選択する。
[1. Select Platform] より、[RHEL/CentOS] (任意) を選択する。 表示されたMono 2.8.1 Downloads (stable) ダウンロードサイトへ移動し、以下のファイルをダウンロードしておく。
mod_mono-addon-2.6.3-6.4.x86_64.rpm が、Apache で動作する ASP.NET のランタイムだ。
このモジュールをインストールする前に Apache をインストールする。今回使用するモジュールが対象とする Apache のバージョンは、httpd 2.2。
Apache (httpd 2.2) のインストール。
[root@centkun ~]# yum install -y httpd
Loaded plugins: fastestmirror
Loading mirror speeds from cached hostfile
* addons: ftp.jaist.ac.jp
* base: ftp.jaist.ac.jp
* extras: ftp.jaist.ac.jp
* updates: ftp.jaist.ac.jp
Setting up Install Process
Resolving Dependencies
--> Running transaction check
---> Package httpd.x86_64 0:2.2.3-43.el5.centos.3 set to be updated
updates/filelists_db | 3.9 MB 00:03
--> Finished Dependency Resolution
Dependencies Resolved
==========================================================================================
Package Arch Version Repository Size
==========================================================================================
Installing:
httpd x86_64 2.2.3-43.el5.centos.3 updates 1.2 M
Transaction Summary
==========================================================================================
Install 1 Package(s)
Upgrade 0 Package(s)
Total download size: 1.2 M
Downloading Packages:
httpd-2.2.3-43.el5.centos.3.x86_64.rpm
Running rpm_check_debug
Running Transaction Test
Finished Transaction Test
Transaction Test Succeeded
Running Transaction
Installing : httpd
Installed:
httpd.x86_64 0:2.2.3-43.el5.centos.3
Complete!
次に mod_mono をインストールする。
[root@centkun download]# rpm -ivh mod_mono-addon-2.6.3-6.4.x86_64.rpm
mod_mono のインストールと同時に "/etc/httpd/conf.d/mod_mono.conf" がインストールされる。
yum でインストールした Apache の /etc/httpd/conf/httpd.conf には、以下のエントリがあるため、"/etc/httpd/conf.d/mod_mono.conf" が自動でインクルードされ、mono_module がロードされるようになっている。
#
# Load config files from the config directory "/etc/httpd/conf.d".
#
Include conf.d/*.conf
Apache と mod_mono をインストールしただけだが、ここまでで、基本的な設定は完了。
続いて、動作確認をおこなう。
xsp のデモを Apahce で実行させる。
xsp のデモ用モジュールを Apache のドキュメントルートへコピーする。
[root@centkun ~]# cp /opt/novell/mono/lib/xsp/test/* /var/www/html/
Apache を起動する前に、SELinux を有効にしていると、以下のエラーが発生し、mod_mono のロードに失敗する。
[Thu Jan 20 17:19:45 2011] [error] mod_mono: connect error (Permission denied). File: /tmp/mod_mono_server_global
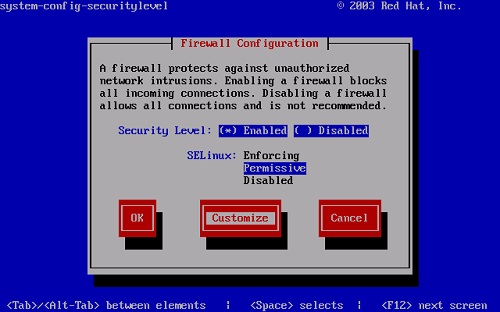
今回は、動作確認のため SELinux を無効にする。
[root@centkun ~]# system-config-securitylevel-tui
[SELinux] で、[Permissive] を選択し、[Customize] を選択する。

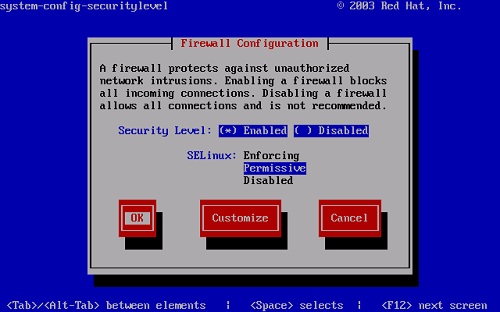
[WWW (HTTP)] が選択されていることを確認する。その他の任意のポートを利用する場合は、そのポートを開放する。設定後、[OK]
を選択する。

[OK] ボタンを選択し、設定を適用させる。

[system-config-securitylevel-tui] は、動的に設定がロードされるため Apache の再起動は必要ない。
しかし、念のため、Apache を再起動する。Apahce を起動していいない場合は、起動する。
[root@centkun ~]# /etc/rc.d/init.d/httpd restart
ブラウザから、Apache にアクセスする。
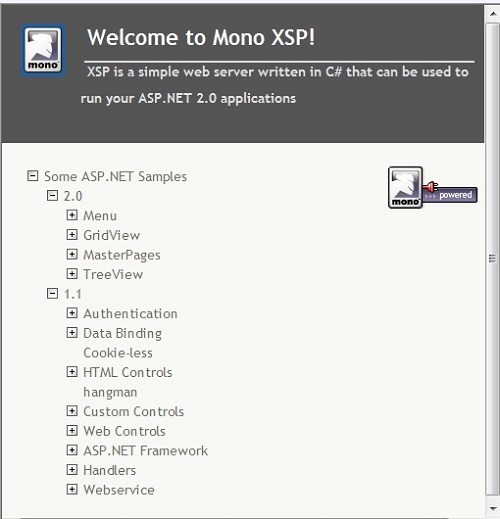
http://192.168.1.19 (IP アドレスは任意) にアクセスし、以下の画面のように、xsp Web
サーバー使った場合と同様の出力結果が得られれば動作を確認できた。

以上、Linux の Apache で ASP.NET が動作させることができた。
次回は、自作のカスタム ASP.NET(*.aspx) が動作すること、コードビハインドがどこまで動作するかについて紹介する予定だ。
コメント (0)
コメントの投稿