AutoGen for .NET
AutoGen の情報を Web で調べると、Python コードの例が多く出てきますが、AutoGen for .NET といった C# 対応のもの提供されています。
- AutoGen: https://microsoft.github.io/autogen/
- AutoGen for .NET: https://microsoft.github.io/autogen-for-net/
Auto Gen for .NET は、Nuget パッケージとして公開されており、実際にコードを書く場合は、このパッケージをインストールして利用します。
- AutoGen Nuget Package: https://www.nuget.org/packages/AutoGen/
Assistant Agent
Assistant Agent は LLM を使用してタスクを解決するエージェントです。 OpenAI のモデルを使用する場合は、AssistantAgent を使用します。 他のモデルを使用する場合は、それぞれ用意されている他のクラスを使用します。 Azure OpenAI Service のモデルを使用する場合は、OpenAIChatAgent を使用します。その他、OllamaAgent, GeminiChatAgent,MistralClientAgent 等が利用できます。
今回は、OpenAIChatAgent を使用して Azure OpenAI Servcie に配置した GPT-4o-mini モデルを使用します。事前に Nuget から AutoGen パッケージをインストールしておきます。
string azureOpenAIEndpoint = "<Azure OpenAI Service エンドポイント>";
string azureOpenAIKey = "<Azure OpenAI Service キー>";
string azureOpneAIModelDeployName = "<Azure OpenAI Service 配置モデル名>";

// Azure OpenAI Service チャット クライアントの生成
AzureOpenAIClient azureOpenAIClient = new(new Uri(azureOpenAIEndpoint), new AzureKeyCredential(azureOpenAIKey));
var chatClient = azureOpenAIClient.GetChatClient(azureOpneAIModelDeployName);

// アシスタント エージェントの生成
var assistantAgent = new OpenAIChatAgent(
	chatClient: chatClient,
	name: "assistant",
	systemMessage: "あなたはユーザーが実行するタスクを支援するアシスタントです。")
	.RegisterMessageConnector()
	.RegisterPrintMessage();
まず、Azure OpenAI client library for .NET の AzureOpenAIClient を生成し、GetChatClient メソッドで、OpenAI.Chat.ChatClient のインスタンスを取得します。
次に、OpenAIChatAgent コンストラクタで、OpenAI.Chat.ChatClient のインスタンス、エージェント名、システムメッセージを渡します。その他 temperature, maxTokens 等のパラメータをここで渡すこともできます。
OpenAIChatAgent インスタンス生成後、拡張メソッド RegisterMessageConnector で、エージェントのミドルウェアに OpenAIChatRequestMessageConnector を登録します。これによりモデル固有のメッセージ形式とのメッセージ形式の変換ができるようになります。
最後に、拡張メソッド RegisterPrintMessage で、メッセージが出力されるようにします。
User Proxy Agent
User Proxy Agent は、ユーザーの入力を他のエージェントにプロキシするためのエージェントです。UserProxyAgent を使用します。
// User Proxy Agent の生成
var userProxyAgent = new UserProxyAgent(
	name: "user",
	humanInputMode: HumanInputMode.ALWAYS)
	.RegisterPrintMessage();

// User Proxy Agent -> アシスタント エージェントへメッセージを送信して会話を開始
await userProxyAgent.InitiateChatAsync(
	receiver: assistantAgent,
	message: "こんにちは assistant、タスクの実行を支援してください。",
	maxRound: 10);
UserProxyAgent のコンストラクタで、エージェント名、入力モードを指定します。入力モード HumanInputMode が、ALWAYS の場合は、UserProxyAgent がメッセージを受信するたびにユーザーの入力を求めます。
次に、UserProxyAgent のインターフェース IAgent の拡張メソッド InitiateChatAsync でエージェント間の会話を開始します。メッセージを受信するエージェントとして先にインスタンスを生成した assistantAgent を指定しています。
User Proxy Agent と Assistant Agent との会話の実行
これまで説明したコードをコンソール アプリケーションで実装した例は以下となります。
using AutoGen;
using AutoGen.Core;
using AutoGen.OpenAI;
using AutoGen.OpenAI.Extension;
using Azure;
using Azure.AI.OpenAI;

namespace AutoGenConsoleAppDemo001;

internal class Program
{
    private static readonly string _azureOpenAIEndpoint = "https://<Azure OpenAI Service エンドポイント ドメイン名>.openai.azure.com/";
	private static readonly string _azureOpenAIKey = "<Azure OpenAI Service エンドポイント キー>";
	private static readonly string _azureOpenAIModelDeployName = "gpt-4o-mini";

	static async Task Main(string[] args)
	{
		string azureOpenAIEndpoint = _azureOpenAIEndpoint;
		string azureOpenAIKey = _azureOpenAIKey;
		string azureOpneAIModelDeployName = _azureOpenAIModelDeployName;

		// Azure OpenAI Service チャット クライアントの生成
		AzureOpenAIClient azureOpenAIClient = new(new Uri(azureOpenAIEndpoint), new AzureKeyCredential(azureOpenAIKey));
		var chatClient = azureOpenAIClient.GetChatClient(azureOpneAIModelDeployName);

		// アシスタント エージェントの生成
		var assistantAgent = new OpenAIChatAgent(
			chatClient: chatClient,
			name: "assistant",
			systemMessage: "あなたはユーザーが実行するタスクを支援するアシスタントです。")
			.RegisterMessageConnector()
			.RegisterPrintMessage();

		// User Proxy Agent の生成
		var userProxyAgent = new UserProxyAgent(
			name: "user",
			humanInputMode: HumanInputMode.ALWAYS)
			.RegisterPrintMessage();

        // User Proxy Agent -> アシスタント エージェントへメッセージを送信して会話を開始
		await userProxyAgent.InitiateChatAsync(
			receiver: assistantAgent,
			message: "こんにちは、assistant, タスクの実行を支援してください。",
			maxRound: 10);
	}
}
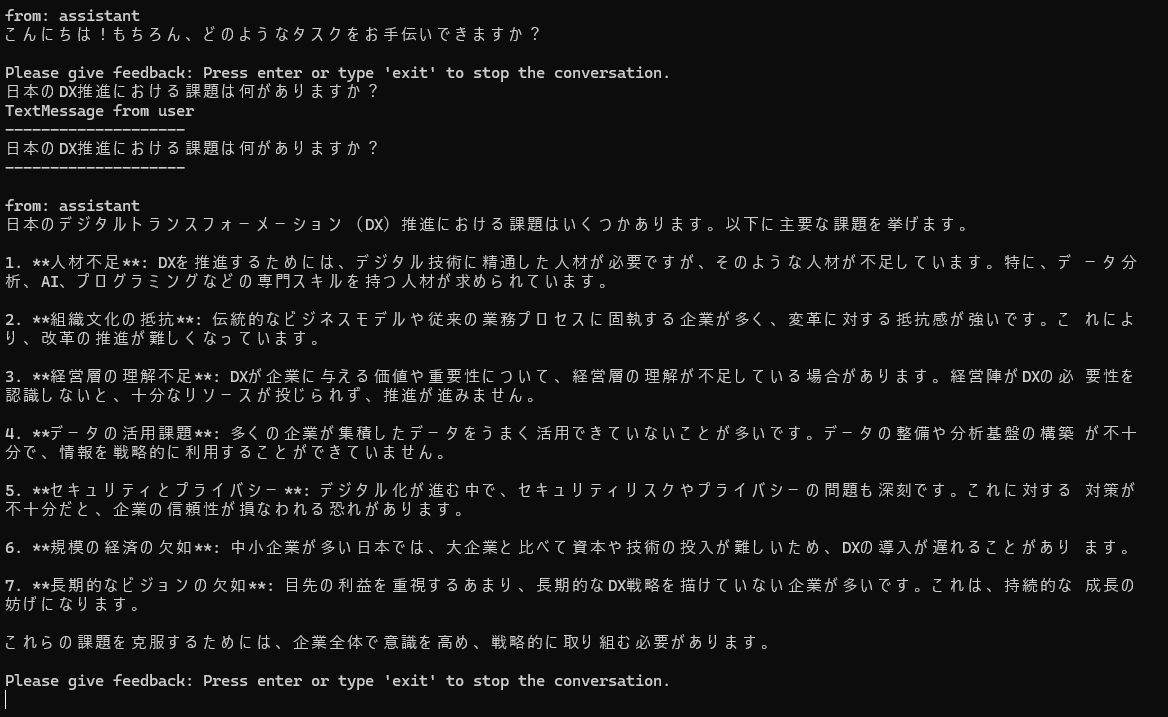
このコードの実行後、userProxyAgent から assistantAgent へメッセージが送信され、ユーザーの入力を待機します。

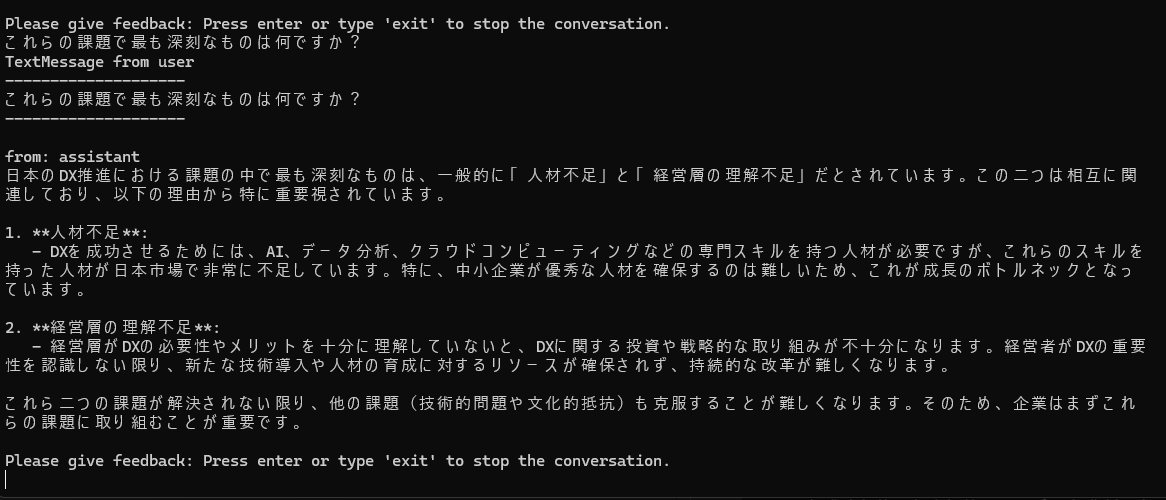
メッセージを入力し [Enter] を押すと、userProxyAgent から assistantAgent へ入力されたメッセージが送信され、assistantAgent からの返信が出力されます。

メッセージのコンテキストを維持してメッセージの入力ができます。

InitiateChatAsync メソッドの引数で指定した maxRound の回数に達するか、exit を入力するとプログラムが終了します。

今回は、AutoGen for .NET の User Proxy Agent, Assistant Agent を使用した簡単な壁打ちチャットの例を説明しました。今後は、もっと多くのエージェントを利用した例を説明できればと考えています。
コメント (0)
コメントの投稿